Help / Frame
Crop
Press ⇧C to crop on the preview. Drag the edges or corners, pick a shape if you like, then click Done.
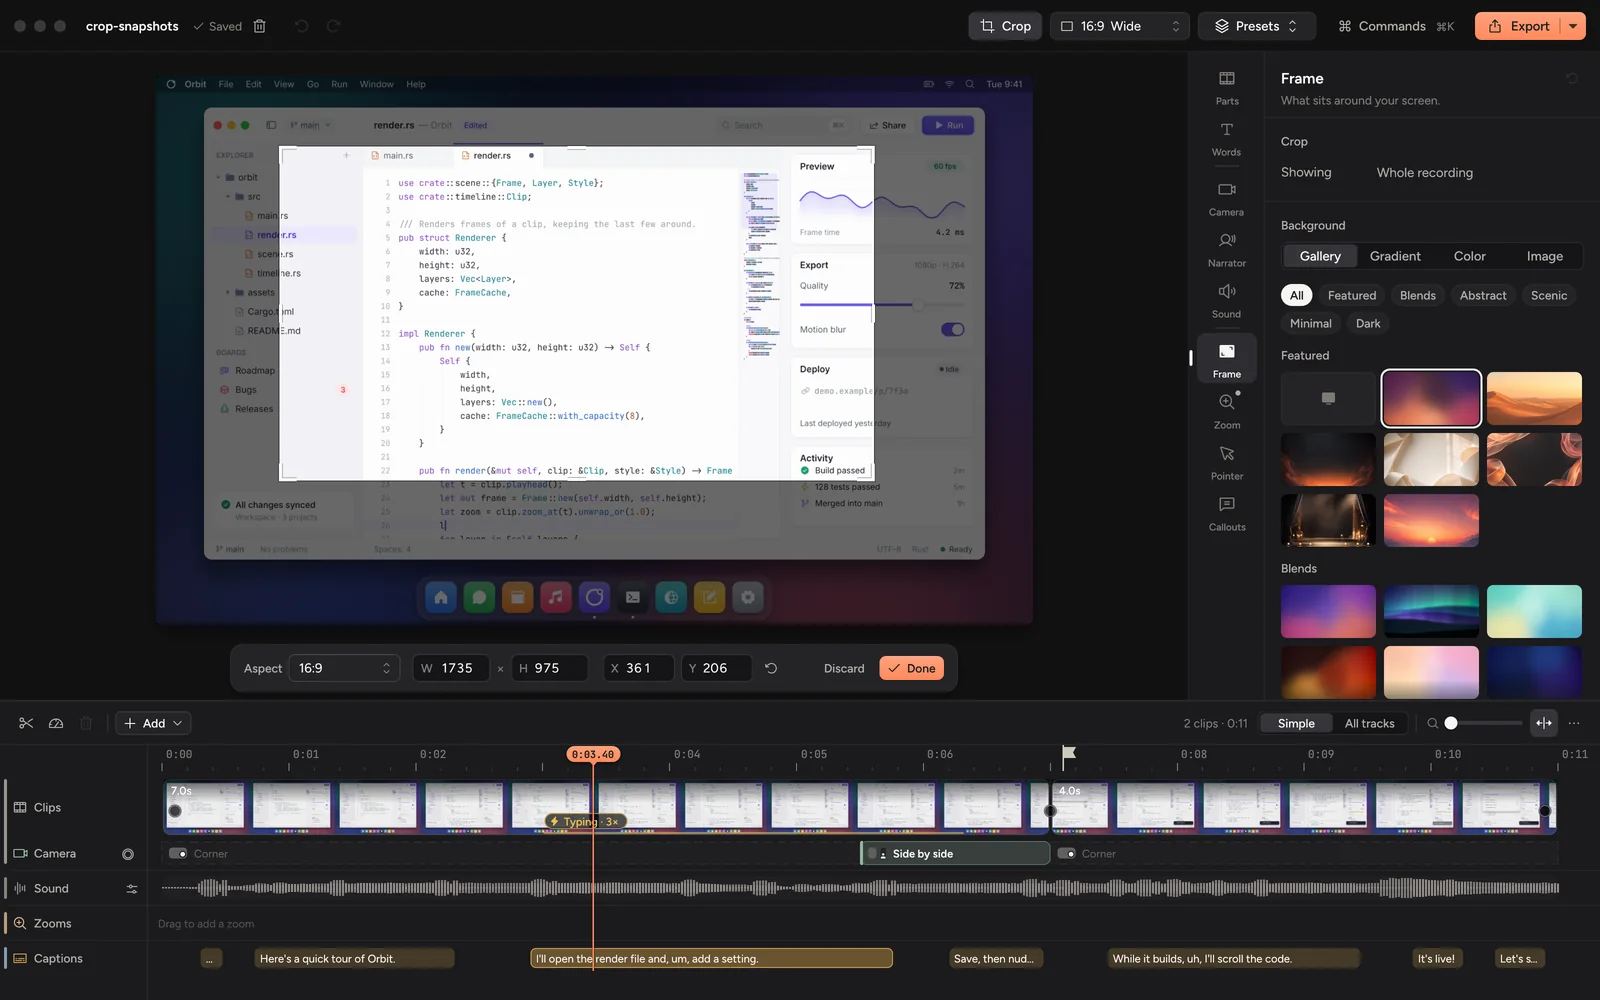
Crop your recording
- Press ⇧C, or open the Frame tab (⌘6) and click Crop… in the Crop row under Around your screen.
- The preview shows the whole recording with the crop on top. Drag a corner or an edge to resize it, and drag inside it to move it.
- Click Done, or press ↩.
To leave without changing anything, click Discard or press esc. The whole crop is one undo step.
Handy keys
- Hold ⇧ while dragging to keep the shape.
- Hold ⌥ to resize from the centre.
- Hold ⌘ to turn snapping off. Edges snap to the recording's edges, its thirds and its middle.
- Press the arrow keys to nudge by a pixel, or ⇧ and an arrow for ten.
Shapes and exact numbers
Aspect in the bar under the preview locks the crop to a shape: Free, Fill frame (whatever fills the video's frame), Original, 16:9, 4:3, 1:1, 4:5 or 9:16.
Type into W, H, X and Y to set the size and position in pixels. The reset button goes back to the whole recording.
Undo a crop
Click the reset arrow in the Crop row of the Frame tab, or open crop mode and click reset. Crops are never saved in a preset, so each project keeps its own.
Updated 22 October 2026Something unclear? Tell us